Summary: ClickUp AI transforms how teams manage work by automating repetitive processes, streamlining communication, and turning unstructured data (like those pesky emails) into actionable tasks. In this article, we’ll explore how to leverage ClickUp’s AI Agent to route and manage emails directly within ClickUp, creating a centralized, intelligent workspace that keeps your team organized and focused.
Turn Emails Into Auto-Assigned Action Items and Manage Your Inbox with ClickUp AI
How to Turn Emails Into Action Items with ClickUp:
-
In the beginning, your customers created email. When those emails contain work requests or other desired actions, we need a process to turn words into tasks, assigned to the right people for the job. With the setup below, your emails will create tasks in ClickUp. Those tasks will create summaries and lists of action Items, and the action items create auto-assigned sub-tasks for the people to do their work.
At a high-level, the setup works like this:- An email is automatically forwarded (based on customizable criteria) from a specific inbox to a specific ClickUp List.
- ClickUp automatically creates a task in the list with the email subject as the task name, the email message body in the task description, and any attachments uploaded.
- ClickUp AI Fields and automations read the task description, and identify specific pieces of information to copy into various fields/columns, such as a message Summary, suggested Action Items, and the Client Name.
- Then a ClickUp AI Agent reads the summaries and action items, automatically creates sub-tasks for them, and assigns each to the appropriate team member.
- The agent continues to update action items and subtasks as comments or other updates are made to the task. If a user comments they completed an item, the agent can even close the task automatically.
This enables us to triage email requests alongside our more proactive work in ClickUp, delegate tasks immediately, and see all the component work completed in on place. Now, here’s how we approached building this system.
Want Our Best Tips for Using ClickUp AI?
- Start Small and Iterate
- Include a Design Template or Reference
- Use Dynamic Fields in Prompts
- Let AI Help Write the Instructions (Metaprompting)
- Create an Initialization Prompt
- Undercut AI Overconfidence
How to Use ClickUp AI Agent to Automate Action Items From Emails
1) Create the ClickUp List and Setup Email Forwarding Rules
Before we do anything in our email client, we need a destination list first, so we can reference the specific email address ClickUp assigns it and forward messages there.
Begin by creating a list in the space/folder that best suits the types of messages you’re managing (e.g. Client Emails). Once created, right-click the list in the ClickUp sidebar and select Email to List from the menu to copy its unique address:
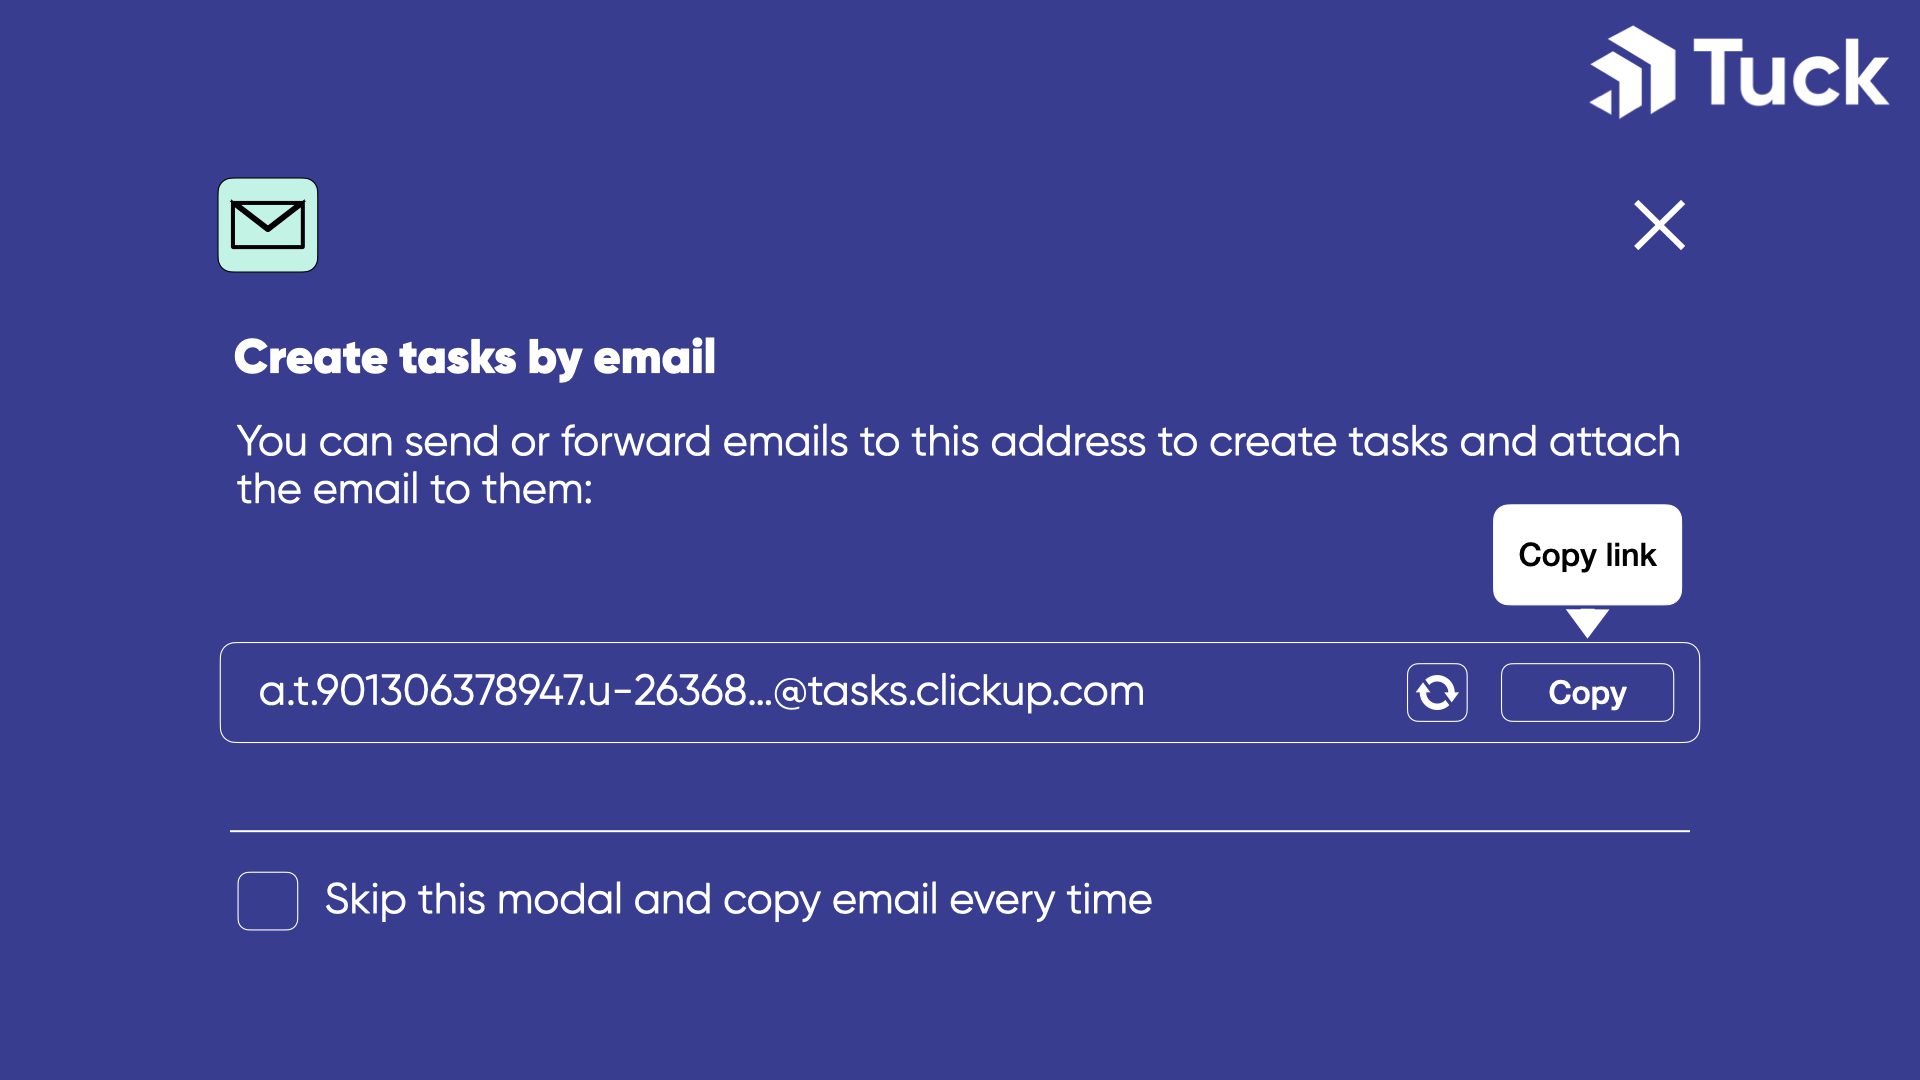
For now, we’ll work with one destination list. If you’re perhaps working with different clients or product teams, you can create separate ClickUp Lists for each and configure the forwarding rules in to determine which messages go where. You could also use ClickUp automations or Agents to move tasks into other areas after they’ve been reviewed.
In any case, with the email address in hand, we can setup auto-forwarding rules in your email client to send any relevant messages into this list.
For Outlook users, a simple entry point is to right-click an email:
- Select Rules > Create Rule
- Set the destination email address and filter criteria
- Click the Preferences icon on the right side of the top Search bar, click “Create Filter” to set criteria
- Choose what happens next, including forwarding the email to ClickUp
2) Identify Outcomes, Setup AI Fields and Prompts
- The email message is contained in the task description in plain text.
- The subject line automatically becomes the task name. Though you can now edit the task names via automations!
- Identifying basic email fields (sender, send date, CC) is simple. Each field is labeled in the description and easy for AI to read.
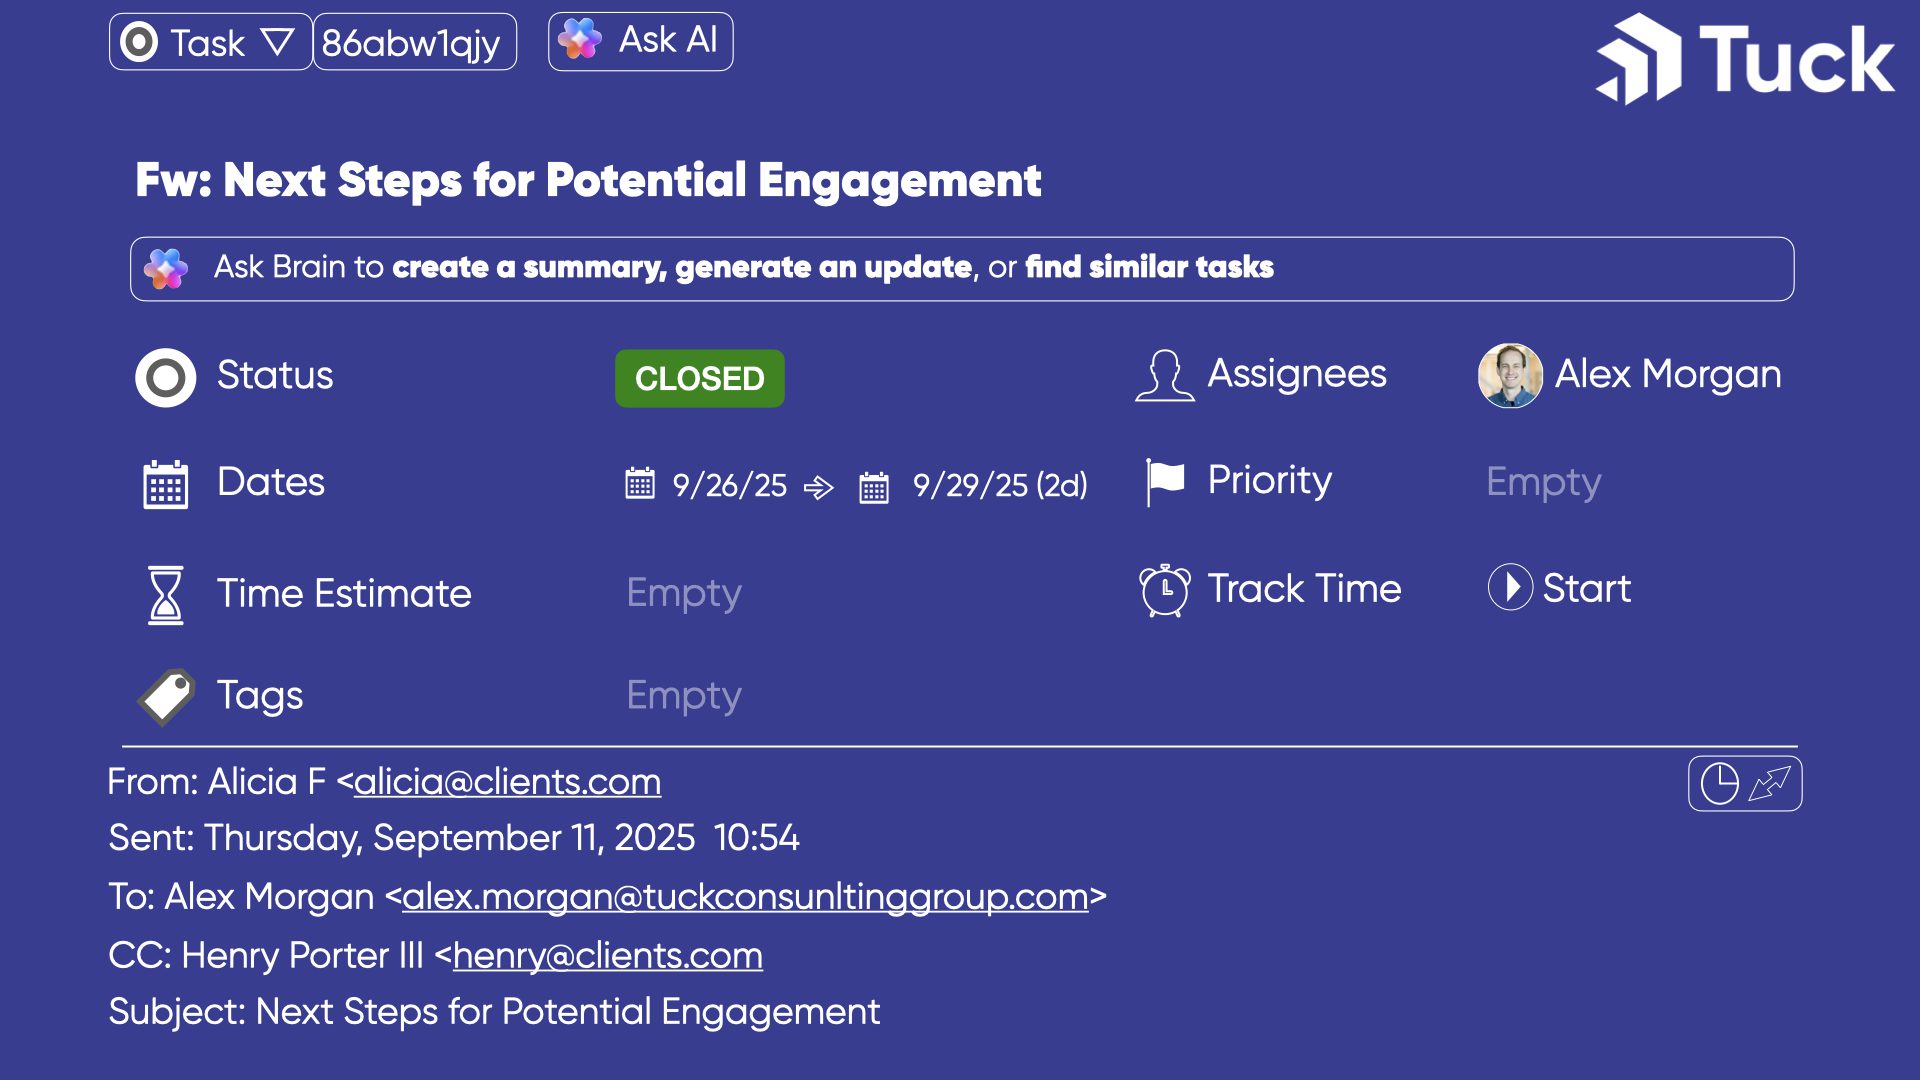
- Email Subject line (this becomes the task name)
- Sender’s name
- A summary of the main message
- Key action items called for by the message
- Suggested Assignee(s) for each action item
- Estimated minutes to read the message (the effort to review)
- Estimated hours to complete the action items (the effort to resolve)
3) And finally, we use an AI Agent for the last step:
- Auto-generating and assigning subtasks for each action item.
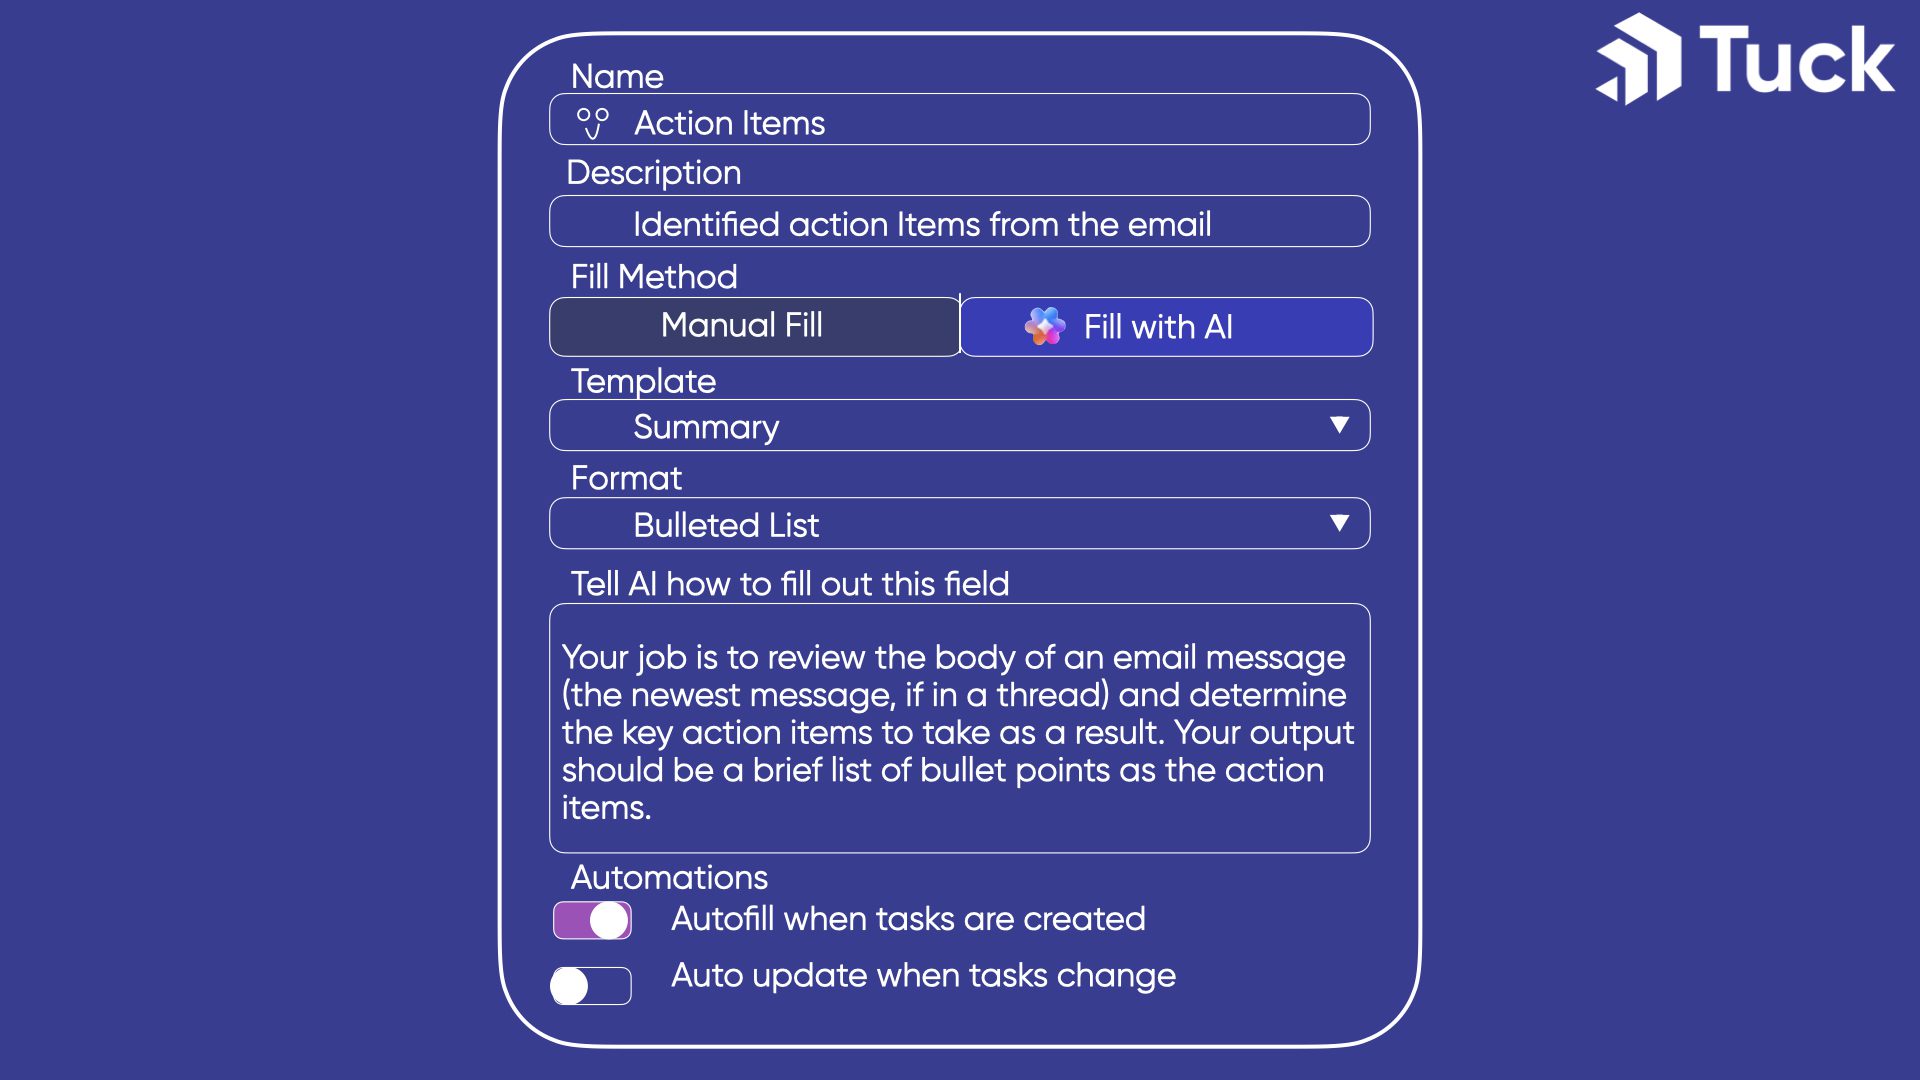
- Template Type (of the prompt): Custom Instructions, a Summary, Progress Updates, Translation, or Action Items.
- Custom Instructions allow us to tailor the prompt to our goals. The other options are pre-built prompts to create the generic outputs stated, no need to leverage them here.
- Format (of the output text): Bulleted list, short text (i.e. brief), or traditional text (i.e. less brief).
- Automations (when to fill/update the field): Autofill when tasks are created (one time) and/or Auto update when tasks change (any time).
- You can check both options to ensure fields are set upfront and as the task is changed. Just be sure not to check “Auto update” if you want the field to remain static once it’s generated.
Prompt Examples
1. AI Field Prompt: Email Message Summary (Custom instructions, Long text, Auto-Fill at Creation Only):
– Your job is to summarize the body of an email message (the newest message, if in a thread). Your output should be a briefer version of the message, one paragraph, not bullet points.
– Read the Task Description, which contains an email. Identify the main message body of the email (not including the from, to, and subject lines, nor the signature/sign-off). Exclude any past messages beyond the first, which would begin with subsequent sections of FROM, TO, and Subject.
– Summarize the body message, retaining as much of the original detail as needed to convey the specifics, but make it brief.
– If the task has a comment that is a reply to the original email in the description, review the body of that reply message and include a summary of that as well, separate and identified with a header.
– Use simple wording and language, avoid fluffy language. Don’t reference “the task” just use short-hand to outline key details.
– Always mention users using their names (e.g. John Doe). Never mention them just by their id.
2. AI Field Prompt: Action Items (Custom instructions, Bulleted List, Auto-Updated Only):
– Your job is to review the body of an email message (the newest message, if in a thread) and determine the key action items to take as a result. Your output should be a brief list of bullet points of the action items.
– Read the Task Description and the Email Message custom field. The former contains an email message in full, and the latter contains an extracted body of text comprising the main message.
– With the task description as context, identify any significant action items/next steps to take from the body segment only and list them as individual bullet points.
– If a specific person or user is identified to perform the action item, list their name in parentheses at the end of the bullet. If the action item is clearly for a person on the client side or the client generally, list Client in parentheses instead.
– If the task has a comment that is a reply to the original email in the description, review the body of that reply message and identify any action items obligated by the message. Add bullet points for any action items obligated by that reply.
– Use simple wording and language, avoid fluffy language. If no specific requests or actions to take are prescribed or clearly required, do not try to make one up or suggest broad actions. Only include them if they are specific.
Most of the information we desired we can extract just like this as text in AI fields and display it in columns in the List view. After the email is received in the Client Emails list in ClickUp, these AI fields automatically read the email message and parse out data as described.
The remaining steps consist of the determining the suggested actions we need to take and who should take them, then creating tasks accordingly. All this requires an AI agent.
Design the AI Agent
- Read the auto-generated Action Items field
- Create individual subtasks for each action item
- Assign each subtask to the appropriate team member in ClickUp, or the Client Team if applicable
- Update statuses or closing action items based on comments on the task
- Only apply to tasks (not subtasks, which could produce an infinite loop)
- Fire when the task status changes to In Progress
- Only fire when the task has its Action Items AI field filled
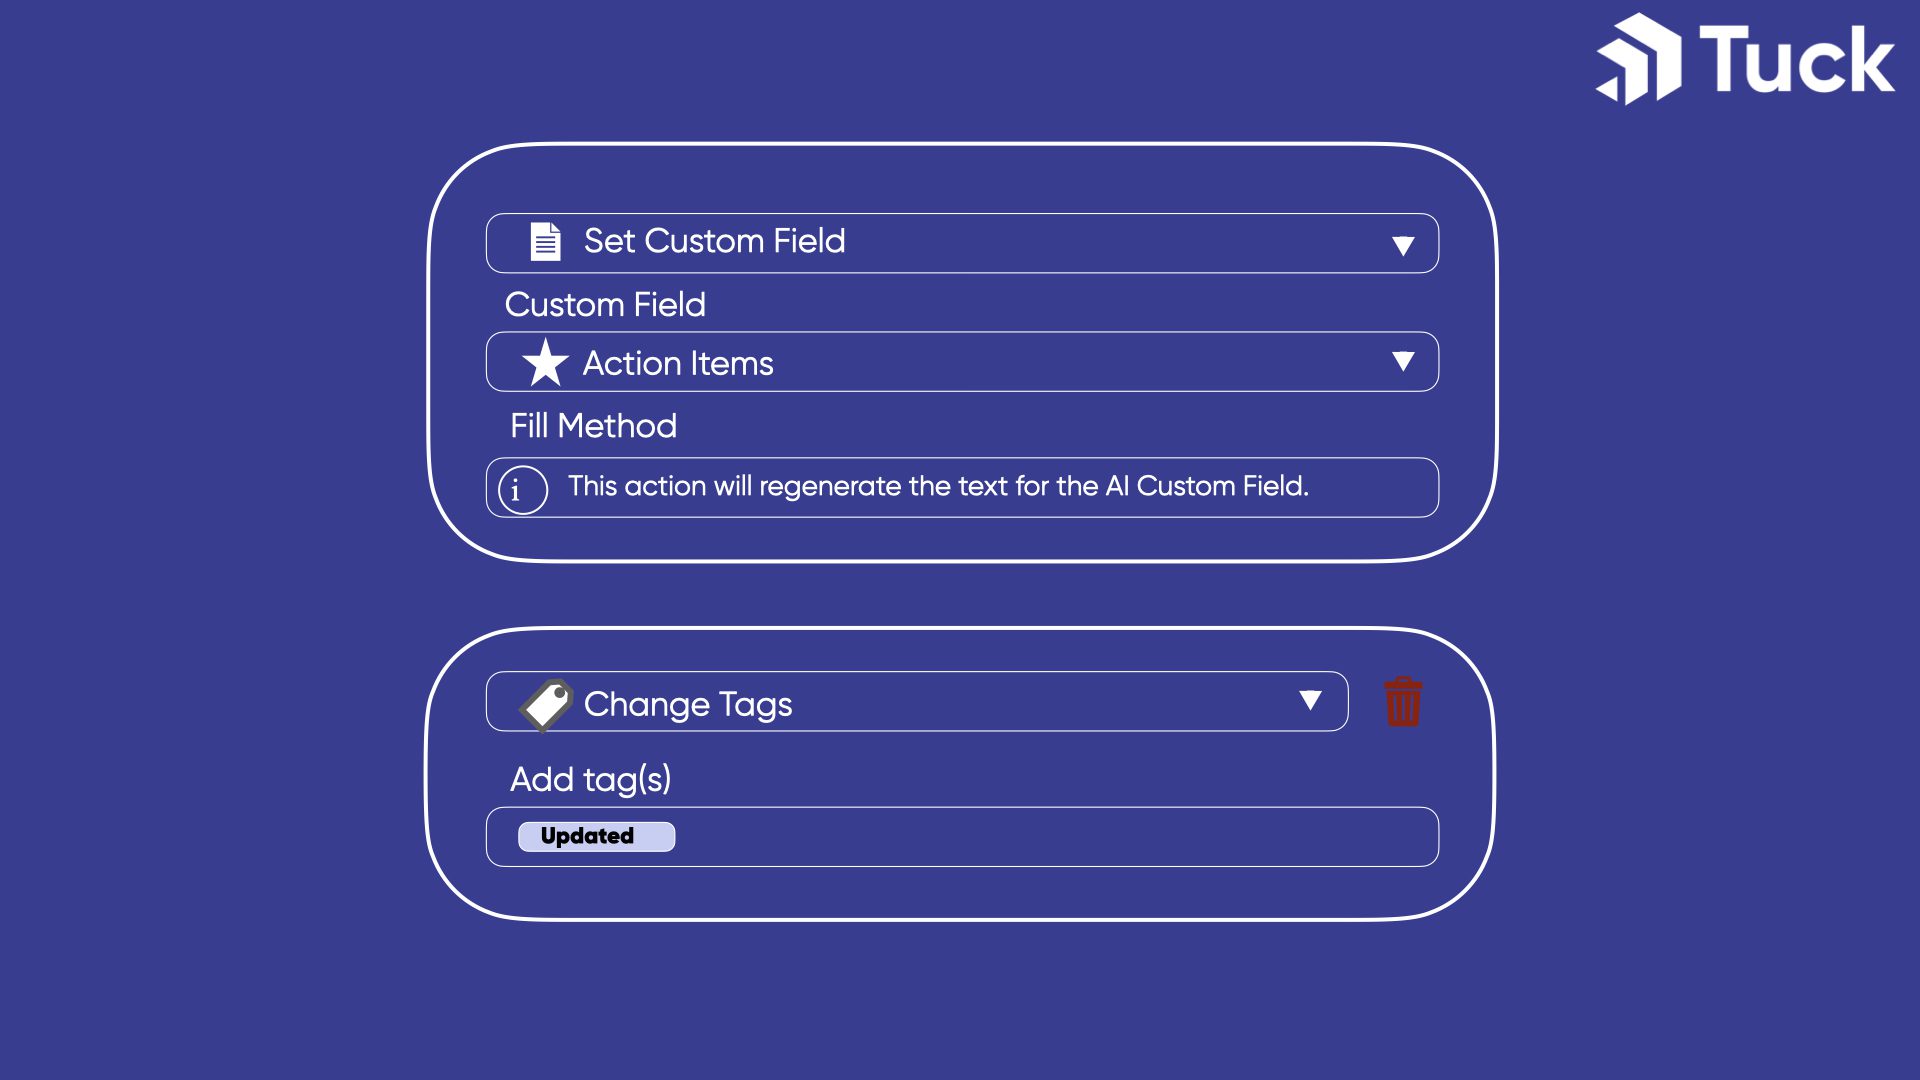
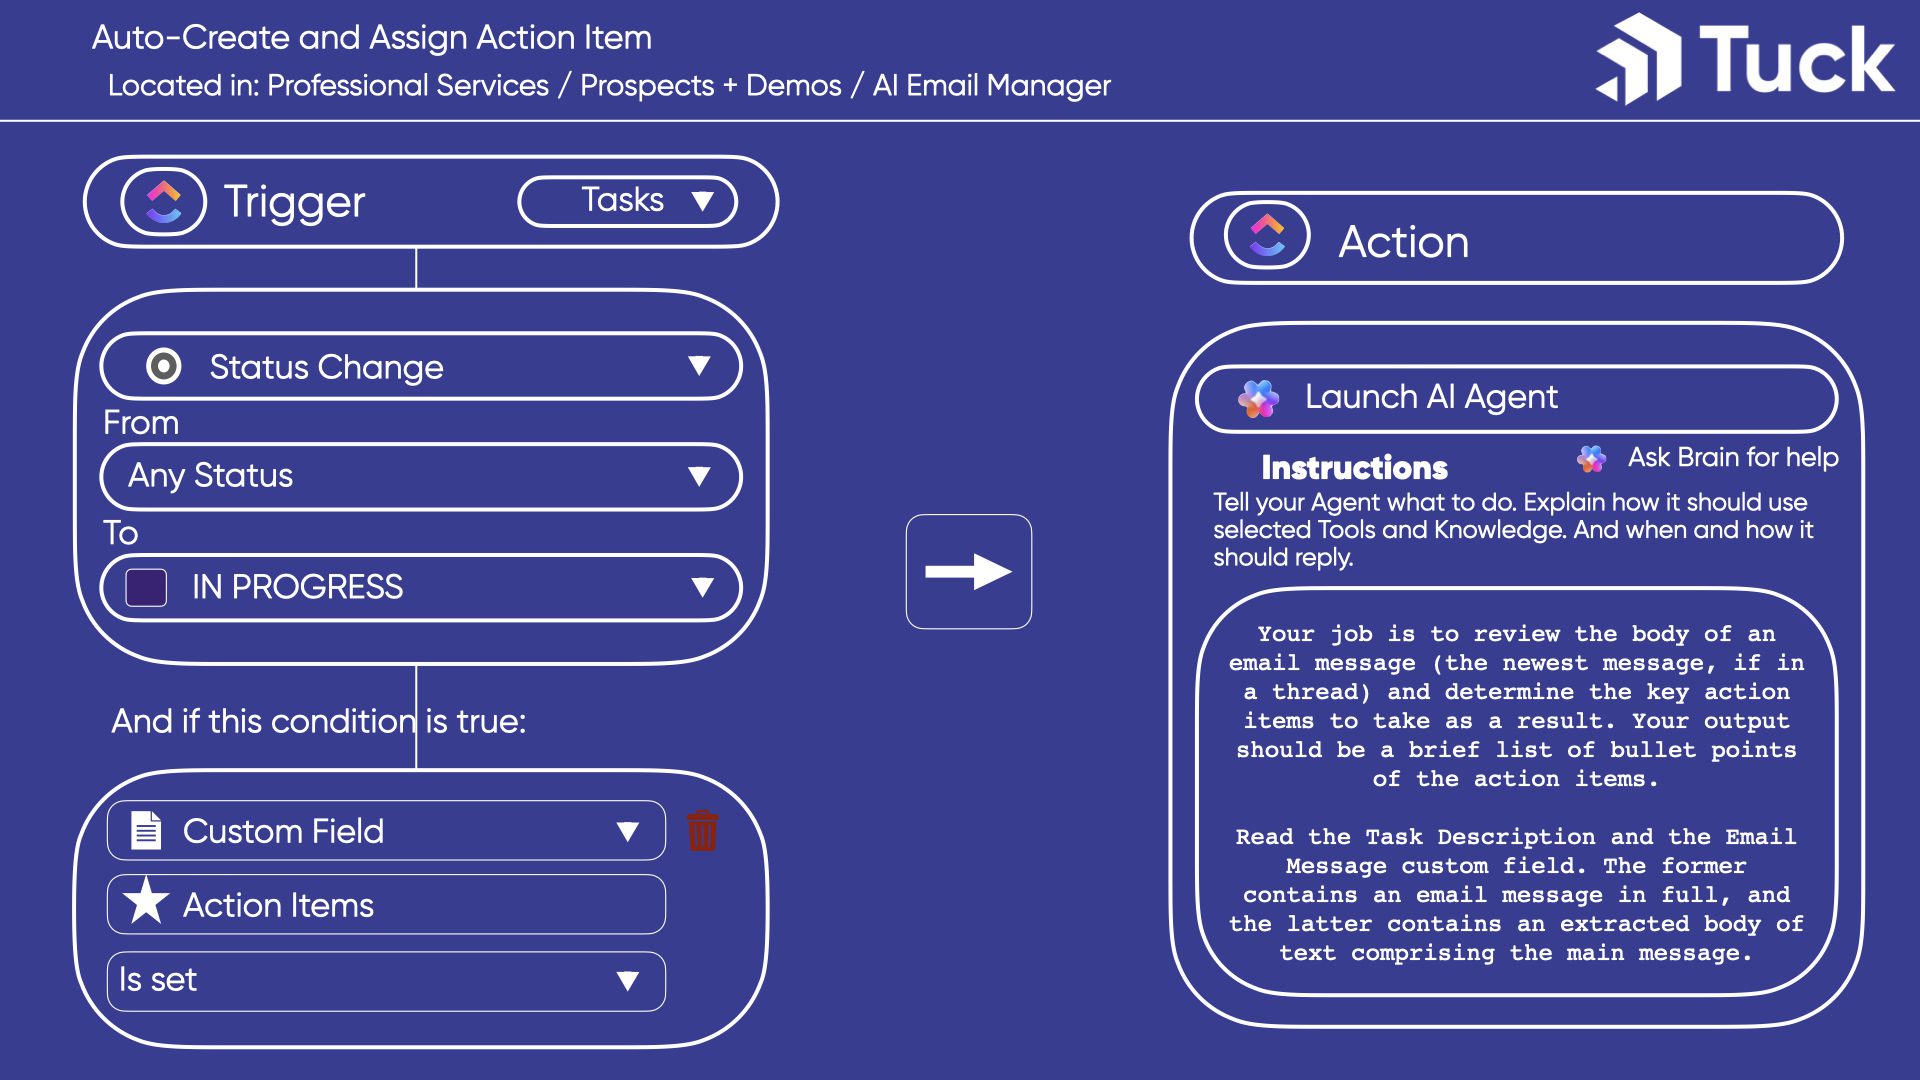
After a few tests and edits, we landed on the prompt language below. The initial listed text contains the main next steps prescribed above, while the text after regards a more advanced automation discussed a bit later.
AI Agent Prompt: Auto-Create Subtasks for Action Items
– Your job is to read a text field of suggested action items and assignments, then create each action item as a subtask and assign it to the right team member.
- Read the action items listed in the Action Items AI field of the task. Each action item is a single bullet and contains a suggested assignee at the end, named in parentheses.
- For any items where the suggested assignee’s name matches a ClickUp user, create a subtask (if there isn’t one matching that action item already). Set the subtask name to match the text of the action item, except the name in parentheses.
- Assign the subtask to the user matching the name in parentheses in the action item. If the name says Client, assign it to the team Client Team.
-Subtasks should remain open if it’s task name matches an action item listed in the Action Items field, and should be closed if it does not.
-If there are other subtasks open under this task, check if the last comment mentions they were completed or done, and if so, mark that subtask as done.
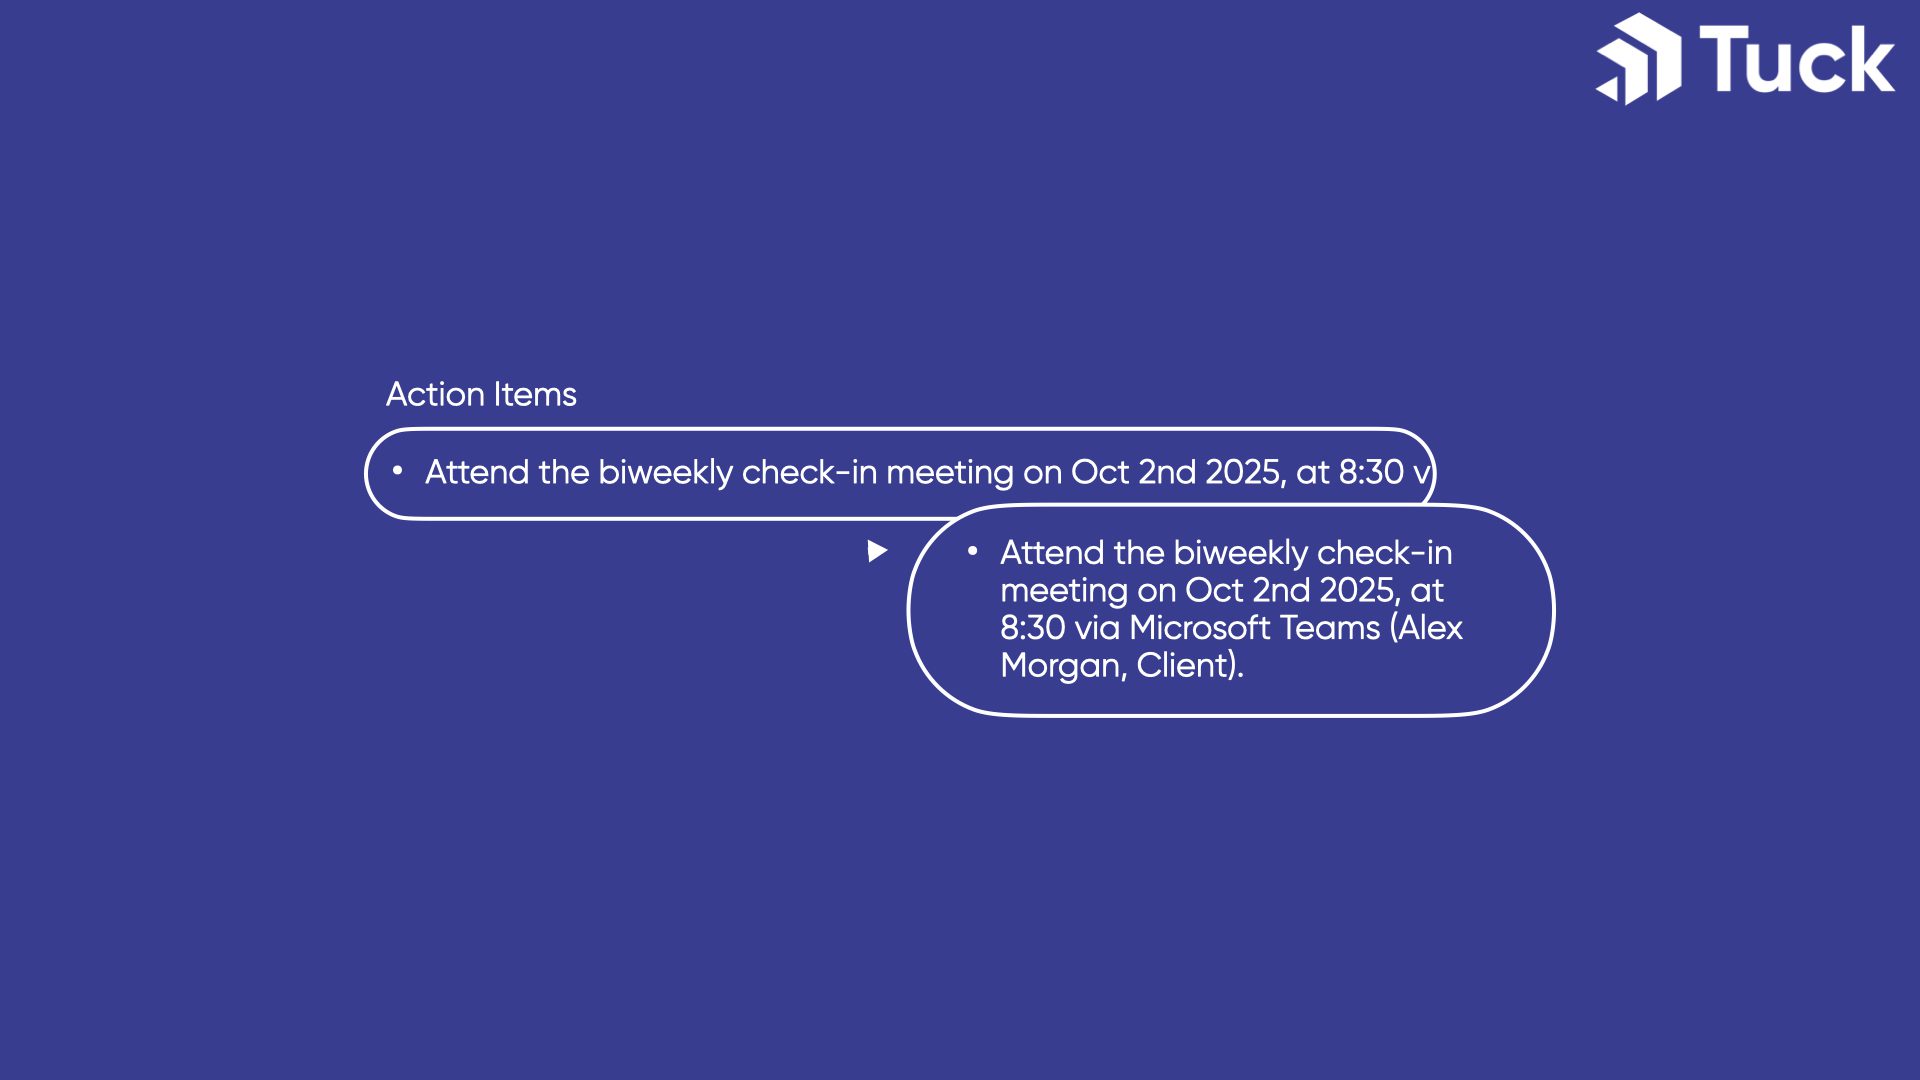
Now Iterate and Refine the System
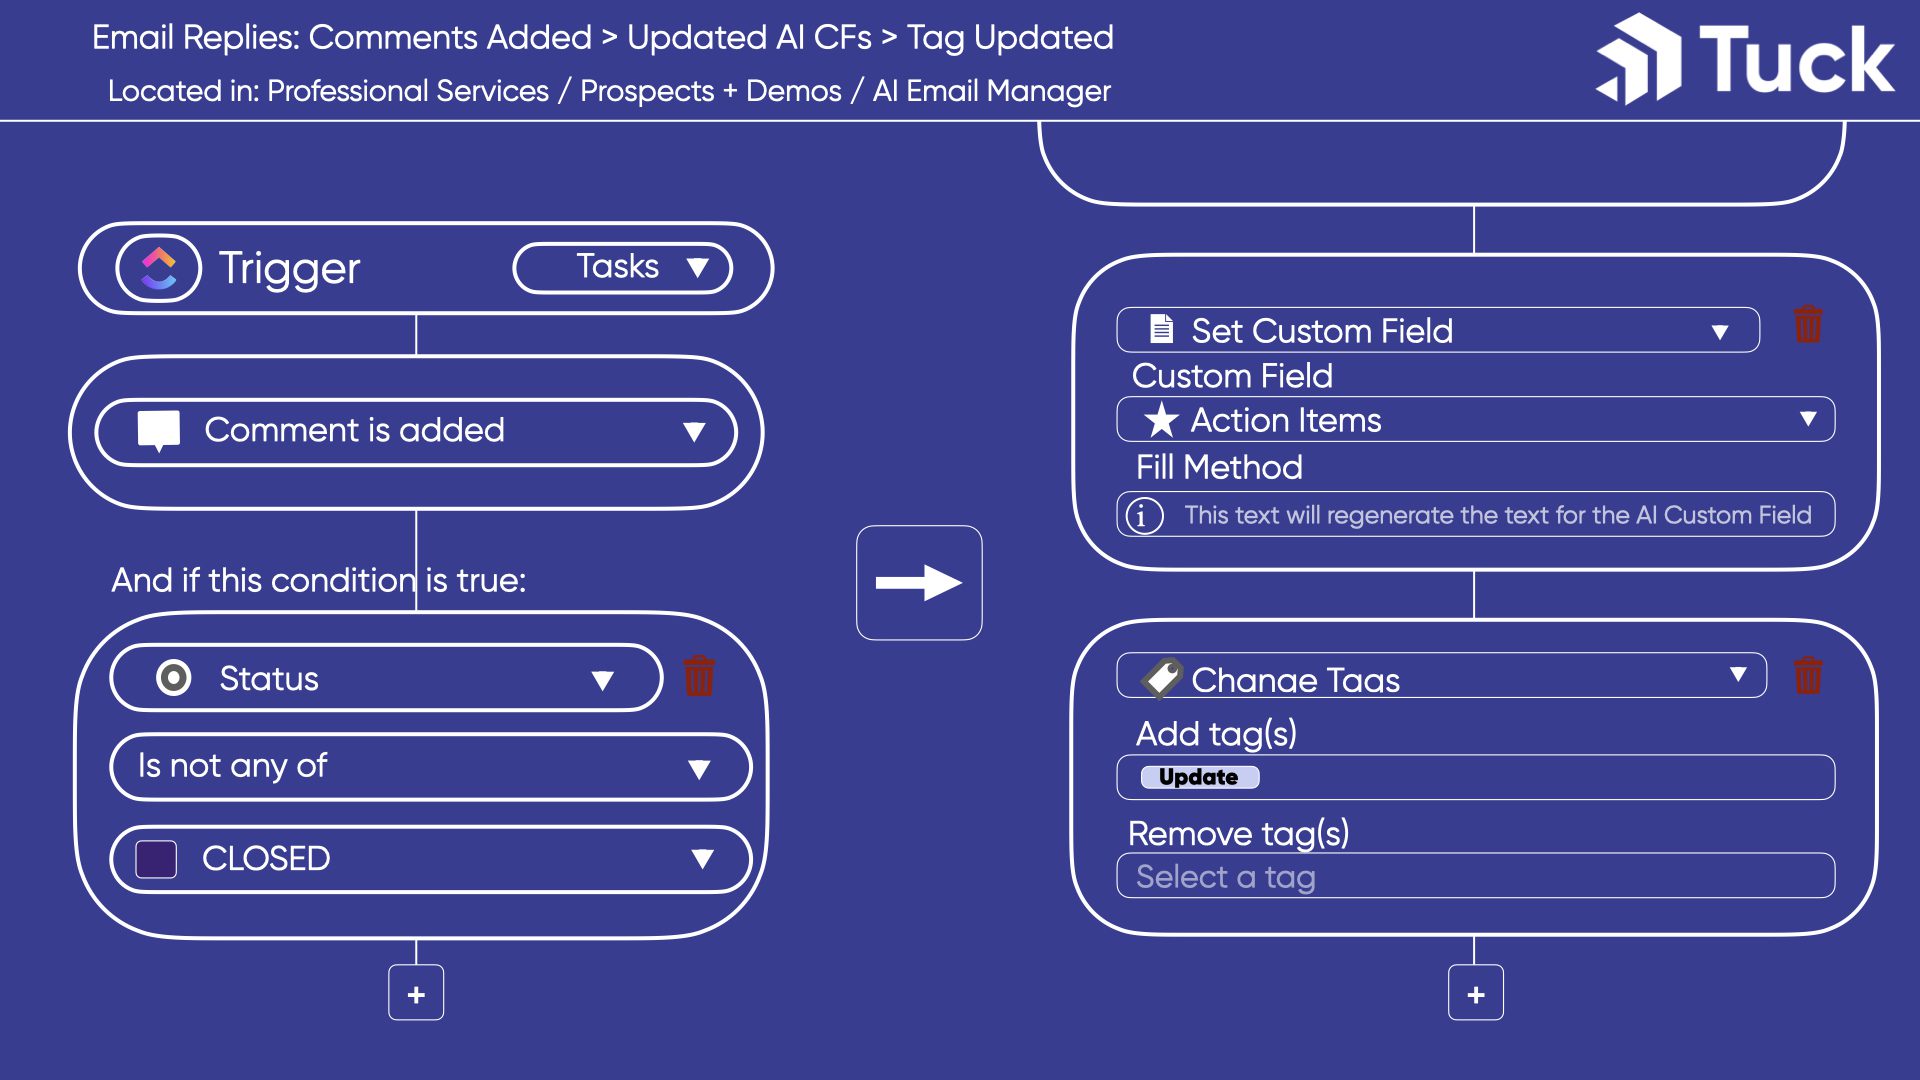
Finally, Monitor and Maintain
How to Maintain Your ClickUp AI Agent
- Ensure emails are properly forwarded: check your inbox and outbox where the rule has been set up regularly for any misses.
- Spot-check email bodies and agent-generated summaries to confirm no key details are missed.
- Confirm subtask assignments look appropriate.
- Optionally, you can create another agent to run a side-by-side comparison and suggest tweaks to the prompt (meta-metaprompting?), but always supplement this with human eyes.
In the End
Ruby Partners
As official Ruby partners for ClickUp, we are licensed to provide you with ClickUp branded professional services. This also makes us, and our consultants, ClickUp experts.


Alex Morgan
Professional Services Practice and Project Management Professional
Alex Morgan (he/him/his) is the IT Professional Services Practice Lead at Tuck Consulting Group. In 2021, Alex began with Tuck as a pro bono consultant for local nonprofits and instantly clicked with the company culture, mission, and clients. Working with diverse clients in tech and adjacent sectors has afforded a breadth of relationships and invaluable strategic insight.
Alex works remotely from Burlington, Vermont. He is a certified ClickUp Expert and is certified with the HubSpot Content Management System and HubSpot Marketing Hub.
When work is over for the day, Alex enjoys live music, NBA basketball, and critiquing TV shows with his daughter (we are equally intrigued to hear more about this last one).


